How to properly install glass and aluminum railings: a step-by-step guide
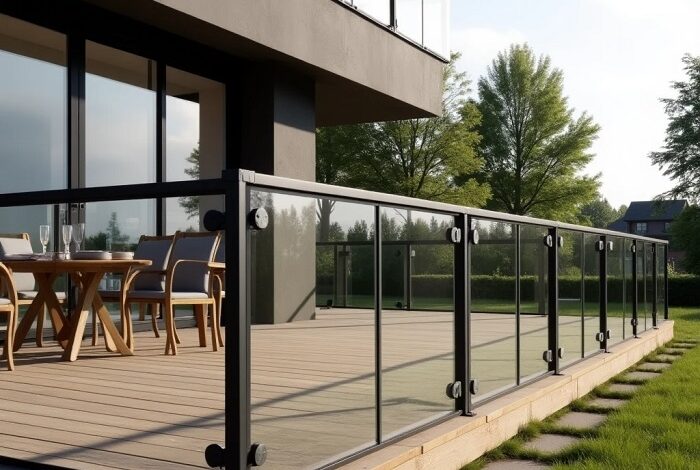
Glass and aluminum railings are one of the top choices for modern homes, condos, and commercial buildings. They offer a clean, contemporary look, require little maintenance, and are incredibly durable — perfect for Canadian weather conditions. But getting them installed right is key to safety, appearance, and long-term performance.
https://alumprorail.ca
In this article, we’ll walk you through the main steps of installing glass and aluminum railings, share professional tips, and help you avoid common mistakes.
Step 1: Planning the Layout
Before any drilling starts, you need a clear plan. Measure your space precisely — whether it’s a balcony, staircase, or deck. Determine the number of posts, glass panels, and rail lengths required.
Tip: Always check local building codes to ensure your railing height and spacing are compliant.
Step 2: Gather the Right Tools and Materials
Here’s a quick checklist of what you’ll typically need:
- Drill and level
- Measuring tape
- Mounting brackets
- Posts (aluminum)
- Glass panels (tempered and polished)
- Fasteners and anchors (suitable for concrete or wood)
- Rubber gaskets and caps
You can find pre-fabricated, high-quality railing systems at trusted Canadian suppliers.
https://alumprorail.ca
Step 3: Install the Posts First
Start by marking the exact locations for each post. Use a level and ensure everything is aligned — small misalignments here will create big problems later.
- Drill anchor holes into your surface (concrete or wood).
- Secure the base plate of each post.
- Double-check the vertical alignment.
Posts are the foundation of your railing system — if they’re unstable, the entire structure will be compromised.
Step 4: Add the Glass Panels
Once your posts are solidly in place, it’s time to insert the glass panels.
- Carefully place rubber gaskets between the glass and metal to prevent vibration and cracking.
- Tighten the clamping system or brackets gently but firmly.
- Wipe down each panel to remove fingerprints and dust before sealing.
For curved surfaces or special shapes, professional customization may be needed.
Step 5: Attach the Top Rail (if applicable)
Depending on the style of railing, you may have a top rail to secure.
- Measure and cut to fit.
- Attach using the manufacturer’s connectors.
- Ensure there’s no wobble or gap between the rail and posts.
Some modern frameless systems skip the top rail altogether — providing a sleek, uninterrupted view.
Step 6: Final Safety Checks and Finishing Touches
- Re-tighten all screws.
- Ensure every glass panel is secure.
- Add end caps, covers, and any decorative elements.
- Clean the entire structure thoroughly.
Pro Tips for a Flawless Installation
- Never skip pre-drilling or leveling steps.
- Always use tempered safety glass.
- Avoid over-tightening — it can crack the glass.
- Wear gloves when handling panels to avoid smudges and injury.
When to Call a Professional
If your project involves multiple levels, curved surfaces, or strict safety compliance (such as pool enclosures or rooftop terraces), hiring a certified installer is a smart investment. DIY mistakes can be expensive and even dangerous.
Conclusion
Installing glass and aluminum railings is a rewarding project when done right. With careful planning, the right tools, and some expert guidance, you can create a stunning, durable, and safe structure that adds value and beauty to any space.
Whether you’re building a new deck, upgrading a staircase, or giving your balcony a modern facelift, these railings offer the perfect balance between form and function.
For those who prefer professional installation and high-quality products, trusted companies like AlumPro offer custom solutions for any residential or commercial project.