UV DTF Crystal Label adhesion guide: surface preparation across acrylic, glass, coated metal, and rigid plastics
When print shops evaluate why a UV DTF (ultraviolet direct-to-film) crystal transfer bonds permanently to one hard substrate yet lifts at the corners on another, the deciding variable is almost always surface energy and pre-application cleaning: standard pressure-sensitive UV DTF adhesive achieves high bond strength on smooth, clean, high-to-medium surface energy materials like acrylic, glass, and powder-coated metal, whereas oily mould-release residues or low-surface-energy plastics cause premature edge peeling.
Establishing a disciplined substrate testing and surface preparation protocol lets commercial print shops quote custom hard goods—from promotional drinkware and cosmetic jars to acrylic display plaques—without costly field replacements.
How Surface Energy and Contaminant Films Control UV DTF Bond Strength
A roll-to-roll UV DTF transfer relies on a pressure-sensitive adhesive layer carried on A-film and laminated under B-film to wet out microscopic pores on the target object when burnished by hand. Unlike heat-activated textile transfers, UV DTF bonds at room temperature through mechanical pressure and chemical affinity between the adhesive and the substrate surface.
Even on ideal materials, three invisible barriers frequently disrupt that bond on the shop floor:
- Silicone mould-release and factory polishing oils: Injection-moulded ABS/PC housings and freshly unboxed stainless-steel tumblers often carry thin silicone or oil films from manufacturing that prevent the UV DTF adhesive from touching the actual substrate.
- Fingerprints and handling grease: Touching the target area with bare fingers immediately before positioning a transfer deposits skin oils that weaken fine letter serifs and thin line edges.
- Outgassing and fresh condensation: Applying transfers onto cold glass or metal jars brought directly from an unheated warehouse into a warm assembly room traps microscopic moisture condensation beneath the adhesive layer.
Substrate Compatibility and Surface Prep Matrix for UV DTF Transfers
Rather than applying every UV DTF label with the same routine, assembly technicians should match their surface preparation and dwell-time checks to the specific rigid material being decorated.
| Target Substrate Category | Expected UV DTF Adhesion Profile | Required Shop-Floor Surface Preparation | Critical Boundary & Exclusion Rule |
|---|---|---|---|
| Cast & extruded acrylic (PMMA) | High initial tack and strong long-term bond after 24-hour dwell | Remove protective masking film immediately before transfer; wipe lightly with isopropyl alcohol (IPA) or antistatic cloth if dusty | Avoid aggressive ketone solvents that craze or cloud clear acrylic edges |
| Soda-lime & borosilicate glass | Strong initial adhesion; requires full dwell time for moisture resistance | Degrease thoroughly with 70%–90% IPA and a lint-free wipe; allow solvent to flash off completely | Glass is hydrophilic—test condensation resistance before quoting chilled beverage bottles; never guarantee commercial dishwasher cycles |
| Powder-coated & painted metal | High bond strength on smooth or lightly satin-finished coatings | Wipe with IPA to remove handling oils; burnish firmly with a felt-edge squeegee across micro-textures | Heavy coarse “wrinkle” or sand-textured powder coats reduce contact area and may cause fine isolated dots to lift |
| Rigid engineering plastics (ABS, PC, PVC) | Reliable adhesion once mould-release agents are removed | Degrease with IPA; run a 24-hour peel test on one sample unit from every new supplier batch | Low-surface-energy plastics (untreated PP/PE) and soft flexible silicone/TPU are unsuitable without specialised primers or alternative printing methods |
Step-by-Step Shop-Floor Protocol for Zero-Bubble Application
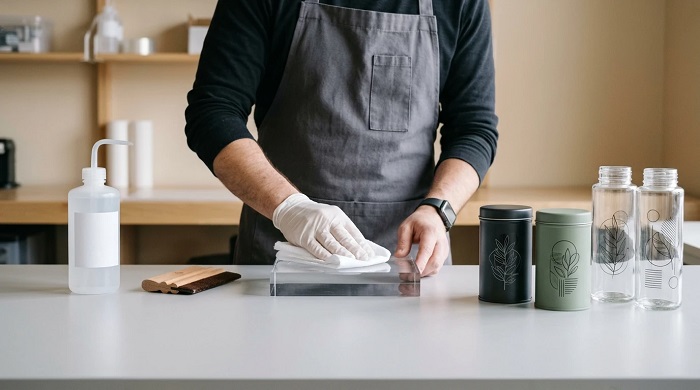
Once the substrate compatibility is confirmed, standardising the manual application motion across assembly staff eliminates 90% of micro-bubbles and carrier-lift defects.
First, bring both the blank items and the laminated UV DTF transfer rolls to stable room temperature before starting assembly. Cold UV ink layers become brittle, making fine details more likely to crack or fail to release from the B-film carrier during peeling.
Second, perform a two-wipe degreasing pass using isopropyl alcohol on a clean microfibre or lint-free wipe, waiting twenty to thirty seconds for the alcohol to evaporate completely so solvent vapour does not get trapped under the graphic.
Third, burnish from the centre outward with firm, overlapping strokes using a felt-tipped squeegee before peeling the B-film carrier. When lifting the B-film, pull it back at a low, flat angle (close to 180 degrees against the surface) rather than yanking upward at 90 degrees, which can rip delicate floating punctuation or thin script strokes away from the substrate.
Matching Roll-to-Roll UV DTF Equipment to Multi-Material Merchandising
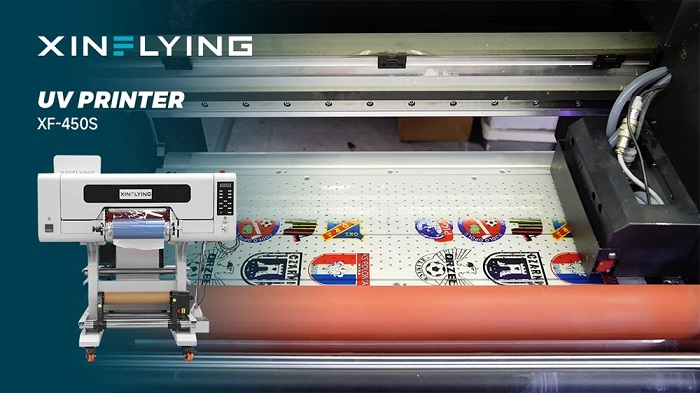
Consistent substrate adhesion starts on the printer itself: uniform adhesive deposition, balanced UV LED curing power, and steady heated lamination pressure ensure that every square centimetre of the transfer sheet carries reliable tack. Print shops evaluating mid-format industrial roll-to-roll platforms such as the XINFLYING XF-450S—or comparing wider 60 cm systems like the XF-600S—can explore the complete XINFLYING UV DTF printer equipment lineup to select a configuration suited to their daily mix of rigid promotional items and packaging decals.
Pairing a well-calibrated roll-to-roll UV DTF printer like the XINFLYING XF-450S with mandatory IPA degreasing and 24-hour sample dwell testing gives commercial decorators a repeatable quality standard across acrylic, glass, coated metal, and rigid plastic orders.